This post was originally part of the DataRobot Community. Visit now to browse discussions and ask questions about DataRobot, AI Platform, data science, and more.
Making predictions typically requires writing and sending an API request. In this tutorial, we will configure and deploy a DataRobot Predictor app capable of making and displaying both single and batch predictions without writing any code. Furthermore, this uses a serverless framework, Zappa, with all of the scaling being done with AWS API Gateway and AWS Lambda for a lightweight final product. Additional features of the app include the ability to view prediction explanations for each prediction in a user-friendly manner, selecting and sending passthrough columns to the predictions, and downloading an audit of all the predictions made through the app.
Before running the startup script, make sure that you meet the following requirements:
- Have AWS credentials located in ~/.aws/config.
- Confirm that you have stored data credentials enabled in DataRobot. (For information on these credentials search the in-app Platform documentation for Stored data credentials.)
- (Optional) Create a redis table to store session variables. Instructions to do so are here, and a free, 30MB free tier account will work. Make note of your connection URL, which is constructed from the redis table name and password shown in the UI with the syntax: redis://:<password>@<address>:<port>. (If you would not like to create a redis table, the app will default to using file system session variables, which may be less secure. The main ‘secret’ variables stored in session variables are filenames and DataRobot API Tokens.)
Once you’ve met the requirements, we will download the code, edit the configuration file, and run the startup script as detailed below.
- Download the source code here.
- Open the zappa_settings.json file in your favorite text editor (so that you can input the parameters from the following steps).
- Navigate to the directory of the installed package and run ./init.sh. This will prompt you for your AWS profile (which should be located in ~/.aws/config) and AWS region and then create the required DynamoDB table, S3 Bucket, and IAM role. You can copy the outputs of this file and enter them into the corresponding locations of the zappa_settings file. If required, you can edit policy.json to give different permissions to the zappa role. As an option, you can instead create these AWS assets manually using the console and then enter them into the zappa_settings file.
- The script will then ask if you would like to generate a service S3 bucket and IAM user. When generated, this will output the bucket name and corresponding authentication tokens for this user. If you already have a bucket you would like to use, make sure you have an IAM user with the permissions listed in bucket-policy.json. Enter the bucket name, access key id, and secret access key in the corresponding locations in the aws_environment_variable section of the zappa_settings file.
- If you are using redis to store your session variables, include your redis credentials in the aws_environment_variable section. These variables will be loaded into the lambda function environment. Example:
{ ... , "SESSION_TYPE":"redis", "REDIS_CONN":"redis://: <password>
@redis-17359.c9.us-east-1-4.ec2.cloud.redislabs.com:17359", ...}
If you are not using redis, you can delete those commented out lines in the template json file, which will indicate that you will use file system session variables.
- Using the command shown here, generate a random string to use as the key to encrypt your flask session variables. Then, copy the resulting string and paste it into the secret_key field in the aws_environment_variables section.
cat /dev/urandom | env LC_CTYPE=C tr -dc 'a-zA-Z0-9' | fold -w 32 | head -n 1
- Save the settings file and run:
source venv/bin/activate
zappa deploy prod
This command will package the application and the virtual environment into an archive which can be consumed by AWS Lambda. It will then set up and register the new lambda function and create an API Gateway resource to perform the HTTP routing. Once this process is complete (which may take several minutes), it will output the URL it created.
- Navigate to the output URL to access the app, making sure to use Chrome for the best experience. You are now ready to make predictions through the app!
Usage Notes
While there is no upload file maximum size limit for scoring, there are other considerations to take into account. The app automatically routes to the DataRobot Prediction API for files smaller than 10MB and to the DataRobot Batch Prediction API for any files larger than that. While the normal single Prediction API can handle requests up to 50MB, this 10MB limit is smaller due to API Gateway payload limits. To handle this, batch prediction requests are made directly, S3-to-S3. This API request requires your S3 credentials to be saved in DataRobot, which is handled in batch_predict.py. This also means that prediction results are saved in the S3 bucket that you provide. If they are not needed, they can be periodically removed from the bucket using the following cron job:
`0 0 * * 7 aws s3 rm s3://<your-s3-bucket>/preds/ --recursive --profile
<your-aws-profile>`
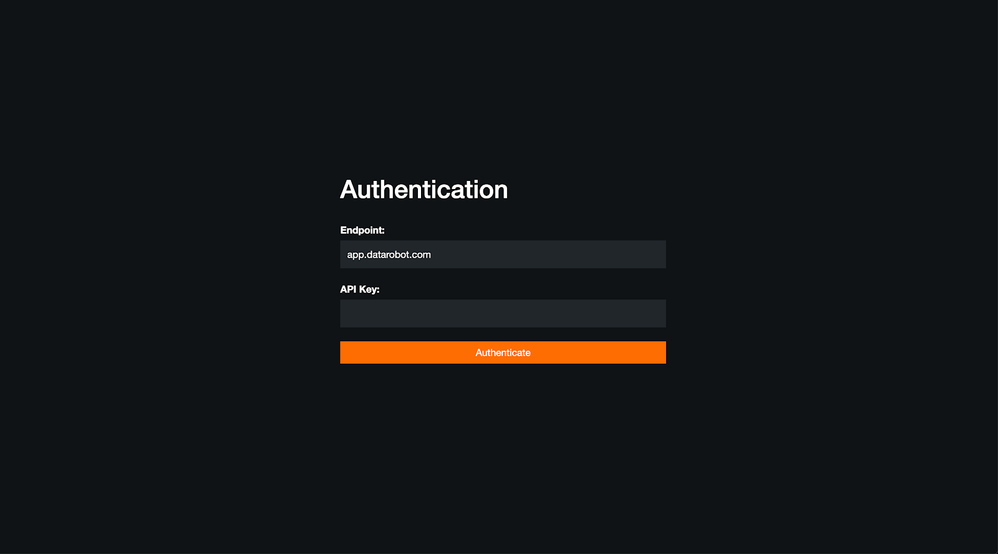
The following screenshots show the workflow of the app. First, you can authenticate with your instance URL and API token (found in the DataRobot UI under your user profile in Developer Tools).
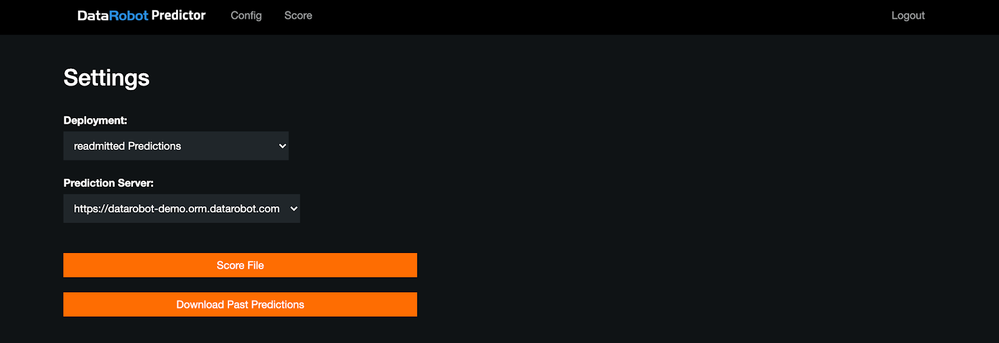
Next, you can select a deployment and a prediction server to make predictions on. On this screen, you also have the option to download past predictions made on the app for the deployment specified in the dropdown menu.
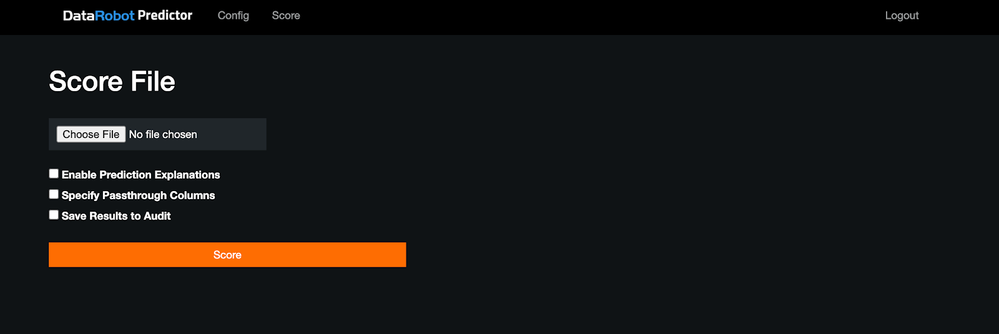
Then you can upload a file to score, and select to enable Prediction Explanations, specify passthrough columns (which are parsed from the uploaded file), and save the results to an audit for later download.
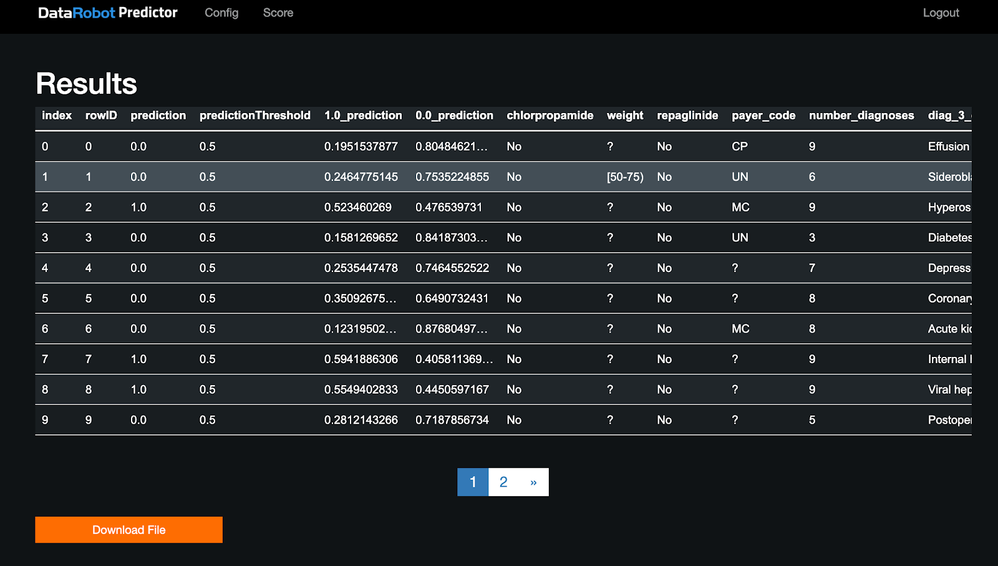
Once the scoring is complete, you can view the results. If the file is greater than 10MB, it shows the first 10MB of data in the display. The full resulting predictions can be downloaded with the link below the table. If Prediction Explanations were enabled, each row can be selected to view the corresponding explanations.
More information
See the Platform Documentation for Predictor App.
Pathfinder
Explore Our Marketplace of AI Use Cases
Visit Now


